Why You Should Consider a Drone Roof Inspection for Your Home
Roof Inspection with a drone turns a risky, time consuming rooftop walk into a fast, documented assessment that delivers high resolution imagery, measured maps, and thermal data without boots on the shingles. This article explains when drone roof inspections make sense, what typical roof inspection cost and deliverables look like, the FAA and safety checks you should require, and the real limits where hands on testing remains necessary. Use the decision criteria and procurement checklist here to choose a qualified provider and get actionable findings you can turn into waterproofing or repair work.
How drone roof inspections work and what outputs to expect
How the workflow runs: A commercial drone roof inspection is a sequence: schedule and site brief, flight planning and risk assessment, automated image capture from programmed flight lines, targeted close-ups of suspect details, post-processing (photogrammetry and thermal stitching), then delivery of a packaged report. Operators must follow FAA Part 107 rules and produce a manifest that shows planned flight paths, pilot certificate, and insurance — confirm these before a flight (FAA UAS).
What affects turnaround: Sensor choice and processing needs drive time. A basic visual shoot with a DJI Mavic 3 Enterprise usually yields geotagged photos within 24 to 72 hours; a mapped ortho mosaic from a DJI Matrice 300 RTK processed in DroneDeploy or Pix4D takes 2 to 5 days. Adding a FLIR thermal payload or RTK positioning improves value but increases planning and post-processing time.
Typical deliverables and why they matter
- Geotagged high-resolution photos: Provide visual evidence of shingle loss, broken tiles, damaged flashing, and are the primary artifact for insurance and warranty claims.
- Ortho mosaic / roof map: A single, scale-correct stitched map used to calculate measured area and to run accurate material takeoffs for coating or replacement bids.
- Roof measurement report (area, pitch, dimensions): Supplies the numbers contractors use for labor and material estimates and helps determine coating eligibility and drainage needs.
- Thermal imaging map: Highlights temperature anomalies that often indicate substrate moisture or insulation failure; beware of solar loading and weather-dependent false positives.
- Annotated defect photos with GPS pins: Fast-tracks repairs by linking a picture to an exact location on the roof map so crews fix the right detail first.
- PDF inspection report with prioritized recommendations: Presents an executive summary, severity ranking, and recommended next steps that link directly to waterproofing, localized repairs, or replacement planning.
- Raw imagery and project files: Enables a roofing contractor or auditor to reprocess images, verify measurements, or integrate the data into a BIM or estimating workflow.
Practical tradeoffs: Photogrammetry delivers accurate area measurements only when flight overlap, camera calibration, and either RTK or ground control points are used; low-overlap flights or reflective metal roofs produce errors. Thermal sensors add actionable clues for waterproofing but must be scheduled during appropriate thermal contrast windows (pre-dawn or cool evenings) to avoid misleading hotspots.
Concrete example: A 10,000 sq ft TPO commercial roof was flown with a Matrice 300 RTK and a FLIR thermal pod; the ortho map showed several low spots where water ponding exceeded 750 sq ft and thermal layers flagged three seam areas with elevated thermal signatures. The building owner used the map to scope targeted seam repairs and install tapered insulation in two ponding zones, deferring full replacement for two years and creating a clear waterproofing scope for contractors.
Judgment you need: Drones are best used to document condition, measure accurately, and triage interventions — they reduce risk and time, but they do not eliminate the need for intrusive moisture testing when a leak source must be proven. Ask for sample ortho files and raw thermal radiometry before you hire anyone; if a provider refuses to share raw files, treat that as a red flag.

When choosing a drone inspection makes sense for residential and commercial roofs
Clear rule: pick a drone inspection when you need rapid, documented condition assessment across areas that are dangerous, time consuming, or expensive to access by foot. Drone surveys replace risky roof walks, produce measurable maps for bids, and let you compare condition over time without putting crew on the deck.
Practical tradeoff: drones excel at visual triage and accurate area measurement, but they are not a substitute for tactile or invasive testing. Use drones to find suspect details and quantify scope; plan hands on follow up where probes, substrate sampling, or physical flashing tests are required.
Operational constraints to consider: tree canopy, very steep or fragile roofing materials, and proximity to controlled airspace limit applicability. Local ordinances and homeowner association rules can also block flights; confirm airspace and permissions in advance with the operator and review FAA Part 107 requirements at FAA UAS.
Three realistic scenarios
Residential post-storm triage: A homeowner needs fast documentation after a severe wind event. A brief drone pass captures missing shingles, ridge cap damage, and broken flashing in high-resolution photos tied to GPS points so the insurance adjuster and contractor agree on the repair scope without repeated rooftop visits.
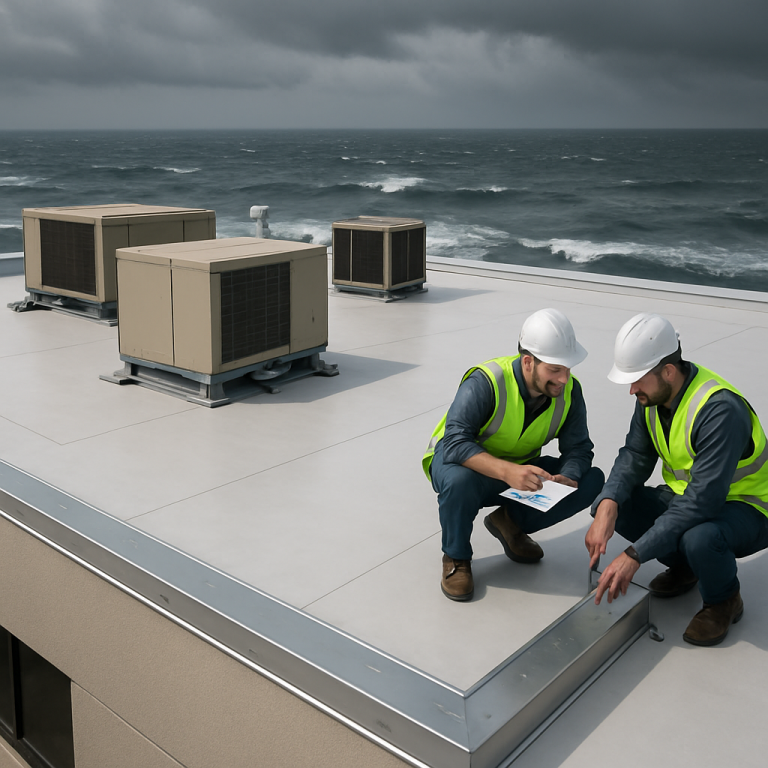
Large commercial flat roof evaluation: A facilities manager oversees several low-slope roofs showing ponding and uneven drainage. A mapped ortho mosaic and daytime thermal sweep identify large ponding areas and likely seam failures; the asset team uses the measured map to prioritize tapered insulation and patching, deferring full replacement until budgeted.
Pre-sale residential inspection for listing: A realtor wants defensible, high-quality imagery for a listing. A drone inspection produces annotated photos and a small-report that flags visible defects (missing shingles, chimney flashing issues) so disclosures are accurate and buyers receive an objective roof condition assessment before offers.
- Choose a drone when: you need repeatable measurement, fast turnaround, or inaccessible sections across multiple rooftops.
- Avoid drones when: the required deliverable is a moisture probe, core sample, or a code-mandated physical inspection that legally requires a hands on check.
- Ask the vendor for: geotagged imagery, stated horizontal accuracy (RMSE or GSD), sample ortho files, and whether thermal was collected under an appropriate thermal-contrast window.
Important limitation: Thermal imagery is time-sensitive — incorrect timing or sun-heated surfaces produce misleading hotspots; insist on vendor timing or calibration details when thermal data is requested.
Next action: if a drone inspection looks appropriate, ask prospective providers for sample deliverables and a short proposal tying the output to repair or waterproofing outcomes (see Roof Waterproofing Services for how aerial findings convert into scope). That step separates aerial photographers from experienced roof inspectors.
What a drone inspection report looks like and how to read it for waterproofing decisions
Executive summary first: the top of the report is not marketing — it should state whether the roof requires immediate waterproofing action, short-term repairs, or monitoring. Treat that one-page verdict as a triage note, not the final word; the rest of the file supplies the evidence you’ll use to scope and price work.
Image gallery and GPS pins: high-resolution, geotagged close-ups are the forensic record. Confirm each defect photo links to a pin on the roof map and carries compass heading and altitude metadata so contractors can locate the flaw without guesswork.
Thermal findings — read these cautiously. Thermal layers highlight temperature anomalies that often correlate with substrate moisture or poor insulation, but they are weather- and timing-sensitive. Check the report timestamp and the operator note about thermal contrast; midday captures on sun-warmed membranes produce false positives that lead to unnecessary invasive work.
Measured roof map and takeoffs: a scaled ortho mosaic with measured areas and slope markers is the single most valuable deliverable for waterproofing bids. Verify the stated horizontal accuracy (RMSE or GSD) and whether RTK or ground control points were used — measurement error at tender time becomes a change order later.
Prioritized defect list and severity grading: good reports separate immediate waterproofing failures (open seams, active breaches) from observation items (minor flashing lift, granule loss). Use their severity ranking to sequence work: stop leaks first, correct drainage second, then plan prophylactic coatings or full replacement.
Recommended interventions tied to cost bands: the practical report links each defect to realistic interventions — patch/spot-seal, membrane splice repair, local re-roof, or coating eligibility. If the vendor suggests coating, expect a short checklist showing substrate dryness, patch repairs completed, and measured remaining lifespan to justify warranty coverage.
How to verify the data behind recommendations
- Request raw files: insist on original photos and thermal radiometry so a third party can re-analyze hotspots.
- Confirm mapping accuracy: ask for RMSE or GSD and the coordinate reference system used for takeoffs.
- Check timing notes for thermal scans: vendor should state solar loading conditions and whether scans were pre-dawn or evening.
- Require annotated scope linkage: each recommended repair should point to one or more images and a geolocation pin.
Practical limitation: reports frequently flag ponding as a long-term replacement trigger. In reality, small localized ponding under 1% of roof area is often repairable with tapered insulation or drainage modifications; only widespread, structural ponding that saturates the membrane over large areas forces replacement. Don’t accept replacement language without measured ponding area and substrate saturation verification.
Concrete example: A 10,000 sq ft TPO roof report showed three thermal hotspots clustered near two drain inlets and three visible low spots on the ortho map. The inspector prioritized: 1) emergency drain clearing and splice repairs at hotspots (high priority), 2) install tapered insulation in the two low zones to remove ponding (medium priority), and 3) re-evaluate coating eligibility after localized repairs and a moisture test (low/conditional). That sequence let the owner avoid immediate full replacement while eliminating the active leak paths.
Next consideration: before you award work, map the report’s high and medium priorities to onsite verification: moisture probes at thermal hotspots, confirm drainage elevations on the measured map, and require the contractor to itemize repairs that must be completed before any coating or warranty can be accepted.
Cost comparison and expected return on investment for drone versus traditional inspection
Bottom line: for most multi-roof portfolios and post-storm or insurance-driven evaluations, a drone roof inspection delivers a lower total landed cost and faster decisioning than sending crews up on lifts or walking every roof. That cost advantage is real when you account for mobilization, safety premiums, and repeat visits that traditional methods almost always require.
Typical price bands: a basic residential visual drone roof inspection commonly runs in the low hundreds, while a single-building commercial mapping job with ortho outputs and thermal imaging moves into the mid-hundreds to low thousands depending on sensors and processing. By contrast, traditional lift-access inspections often incur hourly lift rental, spotter and certified climber rates, and permit or traffic-control fees that push costs higher for complex or tall buildings.
What changes the math: sensor choice (thermal vs RGB), need for RTK or ground control, number of rooftops per trip, and local permitting or airspace constraints. An inspector that combines thermal and photogrammetry increases inspection value but also increases planning and post-processing time. Expect per-roof unit costs to drop significantly when the provider can bundle multiple nearby roofs on a single flight day.
Trade-offs and failure modes that affect ROI
Practical trade-off: drones reduce immediate inspection spend but can produce follow-up costs if the data is mishandled. Poorly calibrated thermal scans, low-overlap mapping flights, or missing raw files force repeat visits and erase savings. Always budget a small contingency for targeted intrusive tests that confirm thermal anomalies before awarding large repair or replacement contracts.
Judgment that matters: if you manage five or more similar rooftops, or you require fast, documented evidence for claims or sales, drones almost always pay back in a single inspection cycle. For one-off small, steep, heavily treed single-family homes, the operational hassles and permissions sometimes make a traditional walk more economical.
| Service | Primary cost drivers | Typical turnaround |
|---|---|---|
| Drone inspection (visual + basic ortho) | Flight time, imagery processing, travel; sensor add-ons increase cost | 24-72 hours for photos; 2-5 days for mapped deliverables |
| Traditional lift/walk inspection | Lift rental, certified climbers, multiple visits for inaccessible areas | Same-day to multi-day depending on access and safety setup |
| Follow-up intrusive testing | Moisture probes, core samples, roof access labor | Same-day to a week depending on lab tests |
Concrete example: A regional facilities manager had a 25,000 sq ft warehouse roof with recurrent ponding. A mapped drone survey with thermal flagged the drain areas and measured ponding extent; the owner purchased targeted tapered insulation and local splice repairs rather than an immediate full replacement. The drone route cut initial inspection mobilization costs and produced quantified area takeoffs used to obtain accurate repair bids.
Regulatory, safety, and privacy checklist to verify before hiring a drone inspector
Verify the legal and insurance fundamentals before you book a flight. Insist the operator provides a copy of their FAA Part 107 certificate, current aircraft registration, and a written declaration of commercial UAS insurance that names you as an additional insured if requested. Confirm whether the job needs LAANC authorization or any Part 107 waivers (night operations, operations over people, BVLOS) and require proof the vendor has obtained them. See FAA UAS for the official rules.
On-site safety and operational controls
Operational readiness matters more than low price. A provider who cuts corners on preflight planning or refuses to run a site-specific risk assessment is a liability. Expect a written flight plan, pilot currency logs, a preflight checklist, and an incident escalation procedure before the drone lifts off.
- Preflight brief: crew roles, roof access points, exclusion zones for workers and bystanders
- Weather limits: maximum wind and precipitation thresholds and a go/no-go decision authority
- Safety crew: spotter or visual observer assigned where required and PPE for any personnel on the roof perimeter
- Emergency plan: battery failure, lost link, and immediate landing procedures tied to your site layout
Privacy, data handling, and neighborhood permissions
Data custody is part of the inspection scope, not an afterthought. Confirm how long imagery is stored, who can access raw files, whether neighbors or adjacent properties will be captured, and whether the vendor will blur or redact images on request. If you need the imagery for an insurance claim, insist on delivery of original geotagged files and a chain-of-custody note.
- Local rules and HOAs: check municipal ordinances and homeowner association restrictions before scheduling; some neighborhoods require written resident notification
- Data retention & security: request retention period, encryption standard, and whether data is stored on third-party servers
- Consent & disclosure: get vendor confirmation they will avoid capturing private interiors and will notify neighbors if flights will capture adjacent yards or windows
Practical trade-off: cheaper operators sometimes skip airspace checks or shortcut site coordination to keep prices low. That reduces inspection cost up front but increases legal, insurance, and evidence risk — insurers and courts care about regulatory compliance.
Concrete example: A small office near a municipal helipad required LAANC approval; the first vendor did not secure it and was grounded, delaying the claims process two days and adding a re-mobilization fee. A follow-up operator obtained LAANC the same morning and completed the mapped roof and thermal pass without incident, preserving the inspection timeline for the insurer.
Copy-and-paste request you can send to vendors. Use this when you request proposals so comparisons are apples-to-apples.
- Sample email: Please attach your
Part 107certificate, current aircraft registration(s), and a policy declaration page showing commercial UAS liability coverage (limit stated). Include a recent sample report with raw geotagged imagery and thermal radiometry (if used), a one-page site-specific safety plan, and confirmation of any LAANC or waiver required for this address. Provide estimated horizontal accuracy (RMSE or GSD) for mapping deliverables and state your data retention policy. Send to Contact.

Limitations of drone inspections and when hands on testing remains necessary
Straight answer: drones provide fast, high-resolution observation but they cannot replace invasive diagnostics when the goal is to prove a leak source, verify substrate condition, or confirm adhesive bonds. Visual and thermal data are diagnostic clues, not proof; treating them as final evidence risks mis-scoping repairs or approving coatings on a compromised substrate.
Practical consequence: thermal anomalies and visual defects can point you to a problem area, but they do not measure moisture depth, membrane adhesion, or deck rot. The real-world tradeoff is between speed and certainty: you save time and money on initial triage, then spend additional funds later if you skip the spot checks that confirm the remediation strategy.
Four defect types that usually demand hands-on follow up
- Interstitial moisture in insulated systems: Thermal hotspots over insulated roofs suggest wet insulation but only core samples or calibrated moisture probes reveal saturation depth and whether replacement is needed.
- Delamination or poor adhesive bond under coatings: Visual cracks or blisters seen from the air cannot tell you whether a coating will adhere; an adhesion pull test or small peel-back is required before large-area recoating.
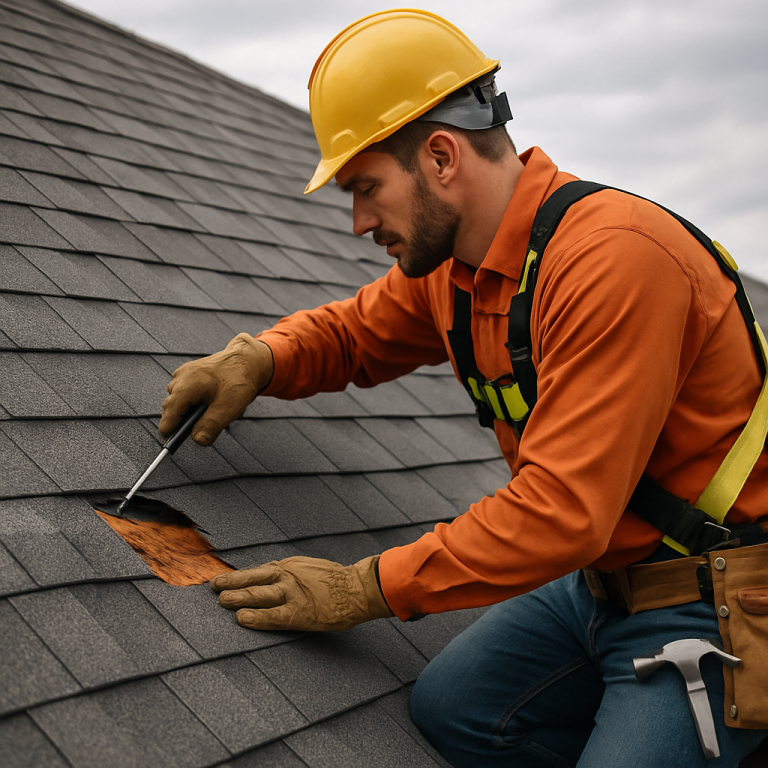
- Decking or substrate deterioration: Soft spots under shingles, cupped decking, or rot around penetrations need tactile confirmation and localized decking replacement rather than a surface-only repair.
- Complex flashings and penetrations: Chimneys, skylights, and HVAC curbs often hide layered failures; a close-up walk, removal of failed flashing, or targeted destructive inspection is the only way to evaluate multi-material interfaces.
Concrete example: On a 1,800 sq ft residential roof a drone detected a cold patch near a chimney and flagged it with thermal radiometry. A follow-up attic inspection and two core samples found a 1.2 sq ft area of saturated sheathing and failing chimney counterflashings requiring localized decking replacement and new flashing details. The targeted hands-on work prevented an unnecessary full reroof and resolved the active leak.
Environmental and operational limits to accept up front: heavy tree canopy, reflective metal surfaces, snow cover, or smoke can mask defects and produce unusable imagery; low battery endurance and restricted airspace create coverage gaps on large campuses. When those factors exist, plan for immediate physical access or staged intrusive testing rather than relying on a single aerial pass.
Judgment call to make before you sign a scope: if the inspection result will drive a warranty decision, a coating application, or a major capital expense, require explicit triggers in the contract for intrusive verification (moisture probes, core samples, adhesion tests) and assign responsibility for who performs them. Good practice follows NRCA guidance on moisture assessment and sampling—demand that level of rigor in your vendor proposal (NRCA).
Next consideration: require the vendor to list specific follow-up tests and who will perform them in the proposal. That avoids surprises and makes drone data actionable rather than merely interesting.
How to select a qualified drone roof inspector and procurement checklist
Start with outcomes, not the drone model. A good Roof Inspection vendor delivers a usable roof inspection report that ties imagery and measurements to repairable actions and costs. If the operator cannot explain how their deliverables reduce uncertainty for a waterproofing or repair contractor, price alone is not the right decision.
Three-stage vetting framework
- Stage 1 – Credentials and insurance: Request a copy of the operator's
Part 107certificate, current aircraft registration, and a commercial UAS liability policy declaration. Confirm limits and whether they will name you as additional insured for higher-value assets. - Stage 2 – Technical proof of capability: Ask for a recent roof inspection deliverable package that includes raw geotagged imagery, an ortho mosaic with stated horizontal accuracy (GSD or RMSE), and any thermal radiometry files if thermal was used. Get metadata showing RTK or ground control points if precise takeoffs matter.
- Stage 3 – Roofing competency and post-inspection support: Verify the vendor has real experience with your roof type (TPO, EPDM, asphalt shingle, metal). Confirm they annotate defects with repair recommendations or can hand off raw files to a licensed roofing contractor for a scope of work and cost estimate.
Practical tradeoff to accept up front. Higher technical capability costs more up front but saves money downstream by reducing repeat flights and producing defensible takeoffs for bids. If you pick the cheapest operator, budget for an extra confirmation visit and potential reprocessing costs.
- Red flag – refuses raw files: If a vendor will not provide original geotagged photos and thermal radiometry, they are selling images, not inspection value.
- Red flag – generic PDF only: Reports without geolocation pins, compass/altitude metadata, or measurement exports are unlikely to support accurate repair bids.
- Red flag – no roofing references: A skilled pilot without roofing domain experience often misses details that matter to waterproofing decisions.
Scoring rubric you can use quickly. Weight categories to match your priorities. Example weighting: Credentials 25, Deliverables 40, Roofing experience 20, Price 15. Score each vendor 0-5 per category, multiply by weight, and choose the vendor with the highest weighted score.
Example decision in practice. A facilities manager evaluated three proposals for a 12,000 square foot low-slope roof. Vendor A had the lowest roof inspection cost but delivered only a PDF with photos. Vendor B provided RTK ortho files and thermal radiometry and scored highest after weighting; their deliverables directly produced material takeoffs used to avoid a premature full replacement. The manager accepted Vendor B despite a higher up-front fee.
Copy-friendly procurement note. Use this when you request proposals: include the site address, desired deliverables (RGB ortho, thermal radiometry if needed, raw images), required accuracy (state GSD or RTK), insurance proof, a recent sample roof inspection report for a similar roof type, and an estimated schedule for delivery. Link to your contact at Contact for proposal submission.
Demand usable data and roofing judgment. A certified pilot without roofing experience is useful for photos but will not replace a professional roof inspection tied to waterproofing outcomes.
Real world examples and how drone inspections lead to waterproofing and repair actions
Direct result: Drone-collected imagery and maps routinely convert vague deterioration into a prioritized, bid-ready repair scope that lets building owners spend on what fixes leaks, not on what looks old. In practice that means fewer full replacements, faster insurance approvals, and clearer waterproofing specifications.
Residential case: targeted repair avoided a full reroof
Situation: An 1,800 sq ft asphalt shingle home was inspected with a DJI Mavic 3 Enterprise (RGB + close-up telephoto); the operator delivered geotagged photos and a 48-hour PDF report. The images showed concentrated wind-lift along one hip, three blown ridge shingles, and a 2 sq ft area of delaminated decking around a chimney penetration.
Action taken: The homeowner used the photos to authorize a localized repair package – replace shingles along the hip, cut out and patch the 2 sq ft damaged deck, install new counterflashings, and apply a targeted waterproofing seal at the chimney – rather than a full reroof. Result: an estimated out-of-pocket cost reduced by roughly 55 percent compared with immediate replacement, and the property passed the insurer review on first submission because of the clear geotagged evidence.
Commercial case: mapping produced a staged waterproofing program
Situation: A 12,000 sq ft low-slope TPO roof was flown with a DJI Matrice 300 RTK equipped with a FLIR thermal pod and processed in DroneDeploy. The ortho mosaic quantified 920 sq ft of persistent ponding and a 45 ft run of seam lift. Thermal layers flagged three likely splice failures adjacent to roof drains.
How that converted to work: The owner funded a three-step program: emergency drain clearing and splice patching (week 1), install tapered insulation across the 920 sq ft ponding zones (weeks 3-4), then perform moisture probes and adhesion checks before any roof coating. This sequencing deferred a premature full replacement, saving a significant portion of the capital outlay and improving waterproofing life expectancy by addressing the drainage and seam issues first.
Practical limitation and tradeoff: Thermal and visual data identify suspect areas but do not prove substrate moisture depth or coating adhesion. In both cases the drone data reduced the investigation footprint, but required spot intrusive tests – core samples and adhesion pulls – before major waterproofing or coating was approved. Insist those verification steps be in the scope to avoid paying twice.
How RoofWaterproofing.us turns drone findings into a scope: First, we prioritize defects on the ortho map by leak risk and drainage impact; second, we schedule targeted hands-on verification where thermal or visual evidence is ambiguous; third, we write a repair and waterproofing spec with measured takeoffs from the ortho mosaic so bids are comparable; fourth, we condition any coating recommendation on passing moisture and adhesion criteria. See our waterproofing services for how this handoff works: Roof Waterproofing Services.
Next consideration: When you order a drone Roof Inspection for waterproofing decisions, require the vendor to deliver geolocated defects, raw thermal radiometry, and a conditional plan for hands-on verification – without that, the aerial data is interesting but not actionable.