Trusted roofing solutions matter because roofing decisions drive asset value, tenant safety, and long-term maintenance costs. This guide gives facility managers and property owners a step-by-step method to select qualified contractors, verify manufacturer and workmanship warranties, and put practical controls in place to protect the building and budget over the roof lifecycle.
1. Align roofing solution to building risk and budget
Start with risk allocation, not price. Choose a roofing path by deciding what failure modes you will accept, how much tenant disruption you can tolerate, and whether the owner prefers capital expense or ongoing operating cost. That decision narrows viable options quickly and prevents chasing low-cost fixes that fail within a few seasons.
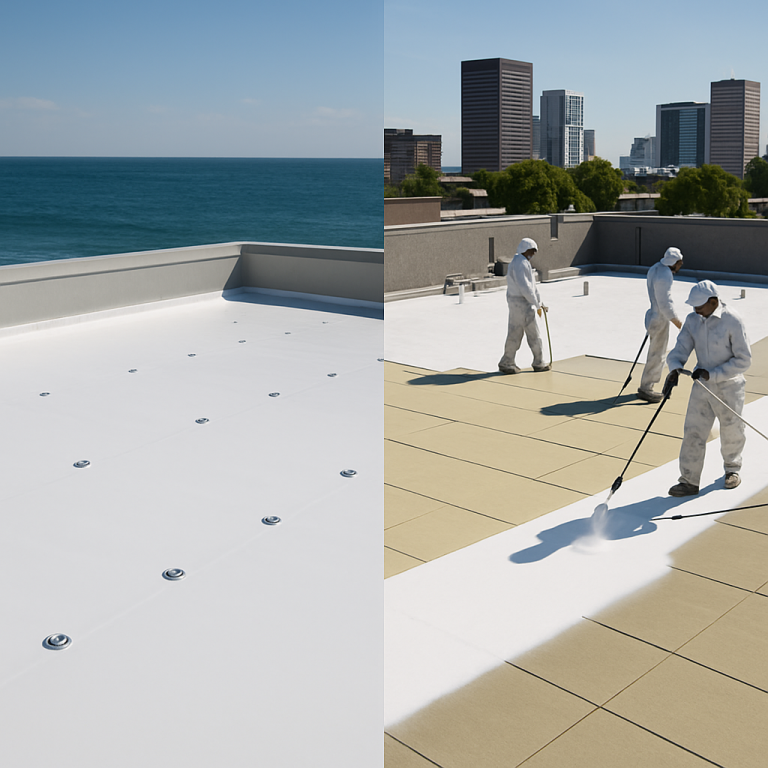
Match the remedy to the underlying problem. Roof coatings and waterproofing are cost effective when the membrane is structurally sound and moisture intrusion is minimal. Full replacement or selective re-roofing is the right move when you find widespread membrane delamination, trapped moisture, or compromised insulation.
Practical trade-off. Coatings buy time and lower short-term capital outlay but create additional inspection and maintenance demands and often limit warranty options. Replacements increase near-term capital but reduce routine maintenance intensity, enable longer manufacturer No Dollar Limit warranties on new systems, and lower lifecycle uncertainty.
Concrete example: For an 80,000 square foot warehouse with a 17 year old TPO roof, minor seam failures, and dry substrate verified by core samples, an elastomeric coating can add 5 to 7 years of service at a fraction of replacement cost. If an infrared survey shows pocketed moisture or membrane separation across multiple zones, plan for phased replacement instead of coating to avoid wasted expense and potential warranty denial.
Decision framework
| Option | When it fits | Key trade-offs |
|---|---|---|
| Roof coating / waterproofing | Membrane intact, minimal moisture, low disruption tolerance | Lower capital, shorter life extension, stricter maintenance needs |
| Selective re-roofing (flashings, penetrations) | Localized failure, good overall membrane condition | Targeted cost, preserves remaining life, requires precise diagnostics |
| Full replacement | Widespread delamination, trapped moisture, or lifecycle reset desired | Higher upfront cost, longer downtime, lower long-term risk |
A common mistake facility managers make. Picking coatings purely on price without objective moisture surveys or core verification leads to repeat work and warranty problems. Manufacturer approval and documented precondition evidence are non negotiable when relying on coatings to extend service life.
If you plan to pursue a lower cost coating solution, require preconstruction infrared scanning and at least three core samples per roof zone before contracting.
Next consideration. Turn this assessment into measurable RFP requirements: list accepted remedies by zone, demand proof of substrate condition, and tie payment milestones to manufacturer approval where possible so trusted roofing solutions align with both risk and budget.
Frequently Asked Questions
Straight answer up front: Most disputes come down to documentation gaps, not product failure. If you cannot produce a verifiable warranty number, pre- and post-work inspection records, and the installer certification, you will be negotiating with insurance and lawyers instead of getting repairs done.
Verifying manufacturer and system warranties
How to check authenticity: Ask the contractor for the issued warranty number and the manufacturer contact used to register the job. Confirm that number on the manufacturer portal (for example GAF warranty lookup or the manufacturer phone line) and get a written confirmation from the manufacturer that the warranty is active for your address and installer.
Practical limitation and trade-off: Manufacturer-certified contractors reduce risk but do not eliminate it. Certification shows trained personnel and access to approved details, but it does not replace clear contract language, defined materials by SKU, or baseline moisture documentation. Expect to pay a premium for installers who carry those certifications and for the documentation that protects you later.
Workmanship, transfers, and emergency repairs
Workmanship versus manufacturer coverage: Workmanship warranties are promises from the contractor about installation quality; manufacturer documents cover product defects and system performance when installed to their requirements. Both are necessary—one covers labor mistakes, the other covers the product itself.
Transfer and timing considerations: Many warranties allow transfer to a new owner but require formal notification within narrow windows and sometimes a fee. If you expect a sale during a warranty period, build transfer steps into closing checklists and capture manufacturer confirmation before escrow closes.
Emergency repairs do not automatically preserve warranty: Quick patching after storm damage is wise to protect interiors, but permanent repairs should follow manufacturer-approved details. Document every emergency action and have manufacturer technical reps approve any nonstandard materials before final repair to avoid later denial.
Concrete example: A mid-size retail center experienced wind damage. The emergency crew used a generic repair membrane and documented the fix, but the owner later learned the patch used an unapproved adhesive. Manufacturer refused system warranty coverage for the affected area. The owner resolved it by contracting a certified installer to redo the repair and obtain a manufacturer sign-off; that cost 30% of the initial repair but restored warranty standing for that zone.
- Immediate actions: Verify the
warranty numberwith the manufacturer and save the confirmation. - Contract controls: Require materials by brand and SKU in the contract and set a financial holdback until the manufacturer issues system approval.
- Field proof: Require pre- and post-construction moisture verification (infrared and spot cores) and attach those reports to the warranty packet.
- Ongoing care: Enroll the roof in a documented maintenance plan with biannual inspections and storm-response logs to satisfy warranty conditions.
Next step to implement now: Call the contractor and demand the warranty number and the name of the manufacturer technical contact; then verify that number through the manufacturer portal or by phone and save the confirmation to your project folder. If you do nothing else, make that verification the condition for the first payment.