Water damage is the single most avoidable cost on commercial roofs, yet most building owners wait for leaks before acting. This guide lays out a practical, step-by-step framework for commercial roof maintenance services, showing how to inventory roofs, set inspection cadences, run preventive tasks, use diagnostics like infrared thermography, and structure maintenance agreements to reduce water intrusion and extend roof life. You will get checklists, a sample schedule, contractor vetting criteria, and KPIs you can implement immediately.
1. Create a Roof Inventory and Risk Assessment
Start with a single source of truth. Build one spreadsheet or CMMS asset for every roof and treat that record as the roof's maintenance passport. If data is scattered across vendor reports, invoices, and memory, you will underprioritize the roofs that cause the most interior damage.
Essential fields to capture
- Basic ID:
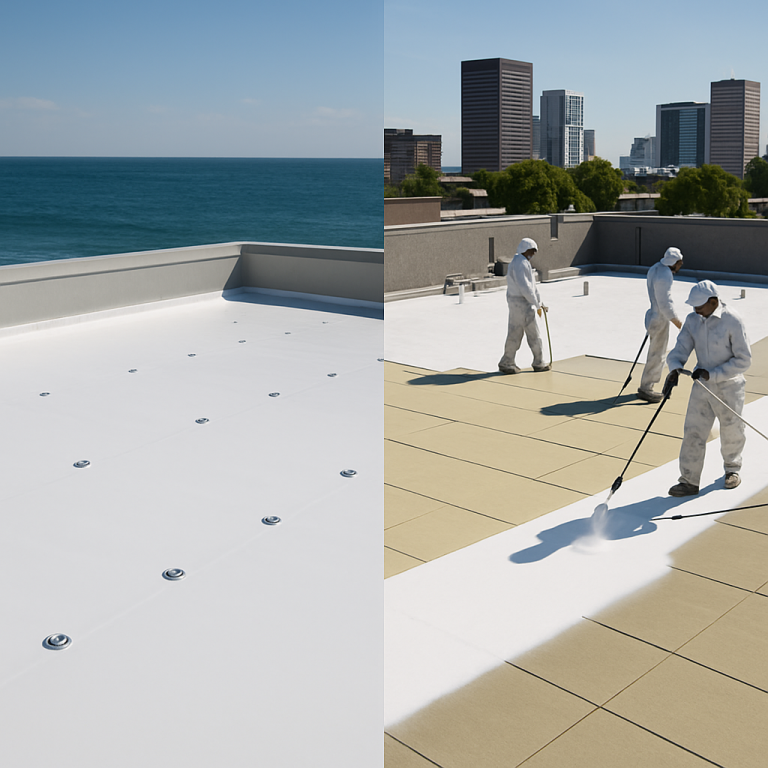
Roof ID, building address, roof area (sq ft), and latitude/longitude for drone ops - System details: roof type and membrane material such as TPO, EPDM, PVC, modified bitumen, or metal; roof slope; insulation type
- Installation and warranty: year installed, installer, manufacturer warranty terms and expiry, coating history
- Condition and history: last inspection date and method, summary of past repairs, known leak locations, thermal images if available
- Site logistics: number and location of penetrations and rooftop units, drains and scuppers with observed ponding locations, safe access points
- Administrative: CMMS asset number, preferred contractor, insurance requirements, and tenant criticality level
Practical insight – start minimally and iterate. Capturing every minute detail up front delays action. Begin with the fields above; add photos and thermal files after the first quarter of inspections. A lean inventory speeds up risk ranking and gets you into scheduled roof maintenance sooner.
How to rank risk so work is applied where it prevents damage
Score by a few high impact criteria. Use age, ponding propensity, penetration density, confirmed past leaks, and tenant sensitivity as your primary axes. Weight these so age and past leaks carry more than cosmetic membrane issues. Roofs that score above your threshold move to active monitoring and expedited repairs.
- Example weights: age > 15 years = 3 points, ponding observed = 3 points, past leaks = 3 points, more than five penetrations = 2 points, high tenant sensitivity = 2 points
- Action thresholds: 0-3 score = scheduled inspections; 4-6 = prioritized maintenance and quarterly checks; 7+ = immediate diagnostic testing and a maintenance contract with guaranteed response times
Concrete example: A retail warehouse with a single-ply TPO roof installed in 2010, six rooftop HVAC units, and a history of two interior leaks scores 8 under the scheme above. The recommended sequence was immediate drain and flashing repairs, a thermal survey to check for concealed moisture, quarterly perimeter checks, and allocation of reserve funds for a coating or replacement evaluation within 12 to 24 months.
Limitation and trade-off. A granular inventory plus frequent diagnostics reduce surprise failures but increase recurring cost and administrative load. If your maintenance budget is limited, prioritize data collection and diagnostics for roofs that the risk matrix flags as high impact. Do not spend on annual thermography for every low risk shed roof.

Next consideration: map each inventory record to an inspection cadence in your CMMS and attach contractual response times so the risk score triggers work automatically.
Frequently Asked Questions
Short answer oriented guidance matters. Clear, decisive answers reduce contractor back-and-forth, speed triage during leaks, and make your commercial roof maintenance services measurable and enforceable.
Practical FAQ answers facility teams actually use
- Inspection cadence: Tailor frequency to the roof risk score — low risk gets monthly visual checks and storm triggers; medium risk adds quarterly drain and perimeter work; high risk requires quarterly checks plus an annual diagnostic run with infrared or moisture scanning timed for dry conditions.
- When to call an emergency crew: If water is visibly entering interior spaces, ponding exceeds 48 hours over critical equipment, or seams and flashings are actively separating, treat as an emergency and invoke your response SLA.
- Coating versus replacement: A coating is cost effective only when the substrate is dry, the membrane has no systemic moisture, and the manufacturer approves the overlay. If diagnostics show trapped moisture, budgeting for replacement or substrate repair is the prudent choice.
- Limitations of diagnostics: Infrared thermography is powerful but conditional – it needs a thermal gradient and is season dependent. Capacitance meters can indicate moisture but require skilled interpretation to avoid false positives near parapets and insulation joints.
- What to demand from contractors: Require manufacturer certifications, sample inspection reports with thermal images, clear repair scopes tied to photos, and defined emergency response times for leak calls.
- Warranty and documentation best practice: Keep a single maintenance record per roof with dated photos, raw thermal files, and signed inspection reports. Manufacturers and insurers treat consistent documentation as evidence of due care.
- Cost tradeoff to accept: Increasing inspection frequency reduces surprise failures but increases OPEX. Use risk-targeted schedules so you invest more where failure causes the biggest interior damage.
- Common quick fixes that work: Rapid drain clearing, re sealing small flashings, and temporary water diversion reduce interior damage while permanent repairs are scheduled.
Real-world use case: A property manager discovered active ceiling stains late Friday. The maintenance agreement required a two-hour response for high-priority leaks. The vendor applied temporary water diversion and a taped patch, documented the condition with photos and thermal snapshots, and returned Monday to complete a welded seam repair. The result: minimal tenant damage and a clear insurance record.
Judgment you will not hear from every vendor: Thermography is not a replacement decision tool on its own. Treat it as a targeted diagnostic that should produce specific core tests and prioritized repairs. Vendors who sell thermography as a one shot solution are shifting risk to you.
• Roof ID and GPS or building address
• Date, inspector name, and inspection method (visual, drone, infrared)
• Photos and raw thermal files attached
• Observed defects with precise locations and recommended actions
• Priority level, estimated cost, and required response time
For a sample inspection template see commercial roof maintenance services and NRCA guidance at NRCA.
- Immediate actions you can implement: Add these to your SOP and vendor SLA within 30 days.
- 1. Insert three SLA tiers into contracts: emergency (hours), urgent (48 hours), scheduled (30 days).
- 2. Require vendors to deliver thermal images and a one page prioritized repair list after every diagnostic survey.
- 3. Schedule annual thermography only for roofs above your risk threshold and in the dry season to maximize accuracy.
- 4. Map FAQ answers into your CMMS as decision rules so inspections trigger the right response automatically.